On this page
What is a Shared Mailbox?
A shared mailbox in Outlook is an inbox that multiple users can access and manage collectively. It’s set up with its own email address and permissions are granted to specific users. Unlike personal mailboxes, users access it through their own accounts, without a separate login. Shared mailboxes are commonly used for collaborative tasks like managing a team inbox or project communication. They don’t require extra licenses, making them a cost-effective solution for group communication.
How to Create a Shared Mailbox
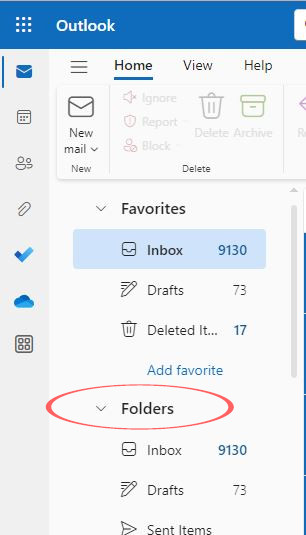
1. After you log into Outlook, right-click Folders
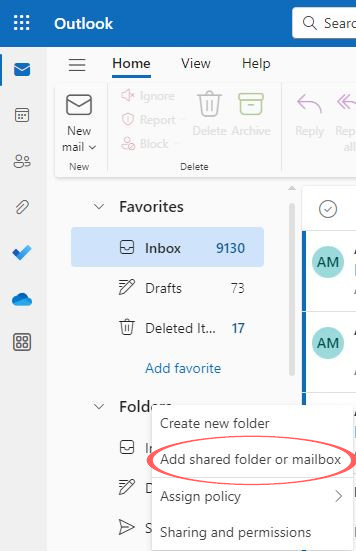
- Click Add Shared Folder from the pop-up menu
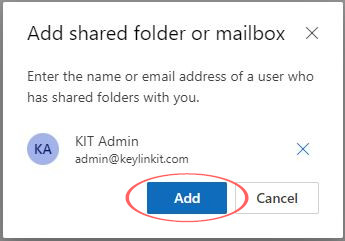
3. A box will pop up and prompt you to enter the email address of the user who you would like to share the mailbox with.
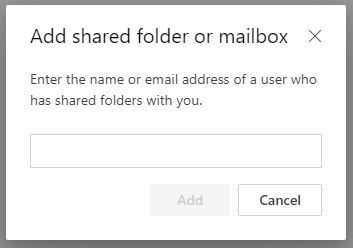
4. Once you see the email and name display, select “Add”
How to Turn On Auto-Responses for Outlook Web Access (OWA)
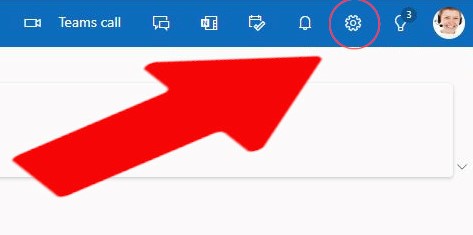
- Click on the cogwheel icon (Settings) in the Mail view’s top-right corner. Then, select View all Outlook settings.
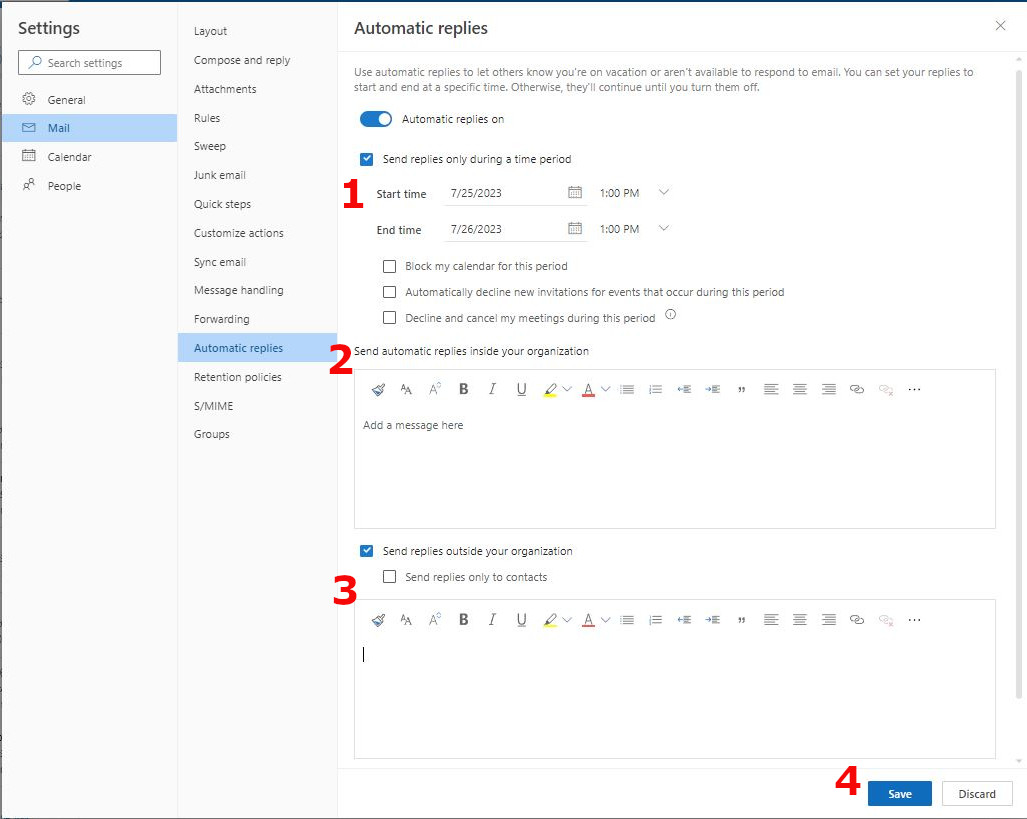
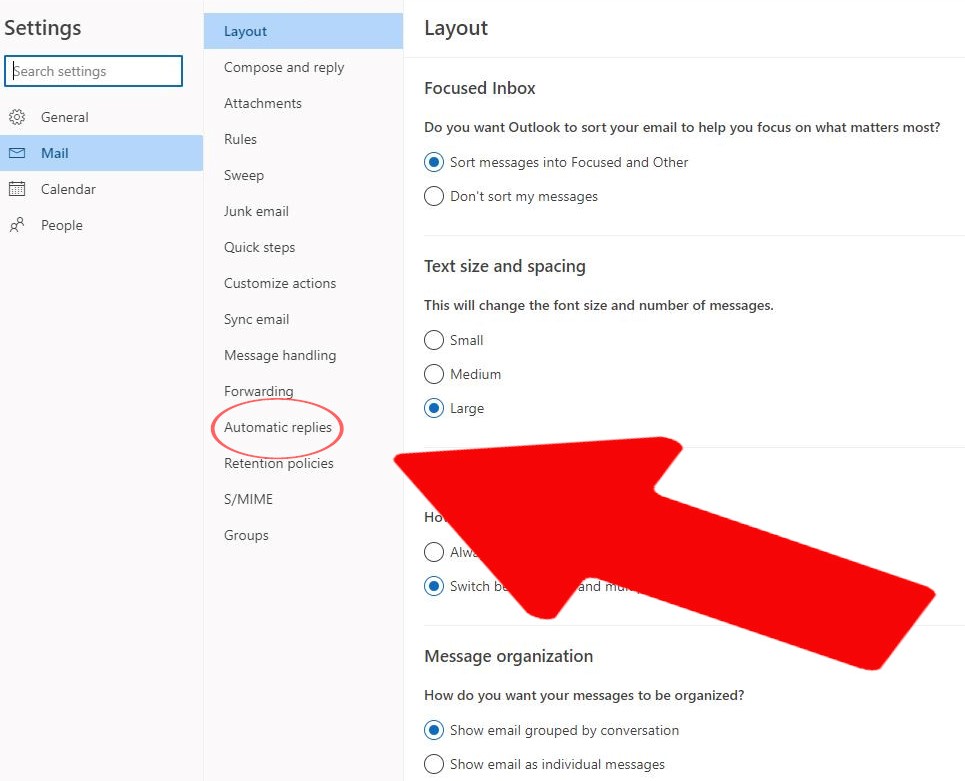
2. Once you open the Settings window, choose Mail and then select Automatic replies.
3. To enable automatic replies, simply click on the toggle next to Turn on automatic replies.
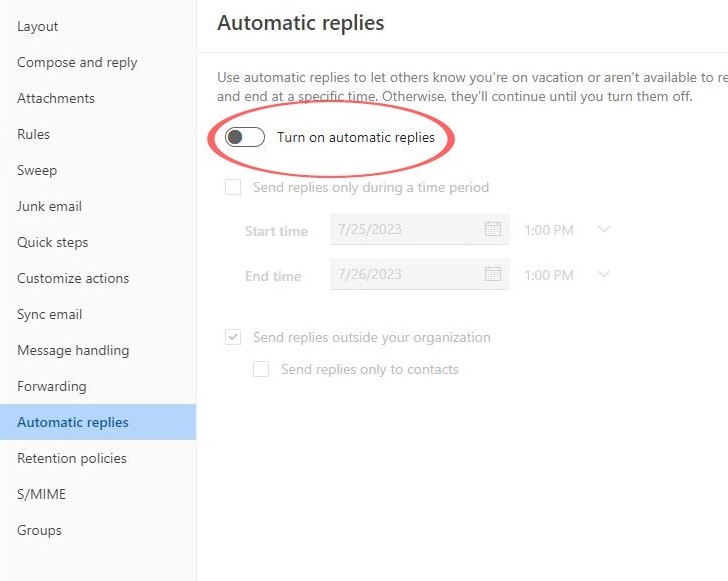
4. To enable automatic replies, simply click on the toggle next to Turn on automatic replies.
4.1. Check the checkbox next to Send replies only during this time period. Then, choose the desired start and end date/time for the automatic replies.
4.2. In the box provided under Send automatic replies inside my organization, type the auto-response message that you would like to be sent.
4.3. If you wish to send an auto-response to external senders, check the checkbox labeled Send replies outside your organization. Then, enter the desired text within the provided box for the auto-response message.
4.4. Select Save.